

This is Part 3 of Deploy a Python web app to Azure App Service on Linux. In Part 1, we went through the Azure Portal to create a Resource Group and an Azure Container Registry. In Part 2, we built a docker image, ran locally and pushed to Azure Container Registry using Azure CLI and Docker. In this Part, we will be deploying a containerized web app to Azure App service. We will also see about how to use different versions of an image in ACR and some API operations of web app using postman.
Let’s start the fun part!
Deploying a containerized Web App
App Service Plan
Whether we have a Web App, API App or Mobile App, it always run in an App Service Plan in Azure. This is kind of a container of our Web Apps, Function Apps etc which can hosts our application with a set of compute resources that are required for an application to run. For example:
- Operating System
- Virtual Machine Instances
- Size of VMs (Small, Medium, Large)
- Pricing Tier
Read more here about App Service Plan to find out it’s capabilities, costing and much more.
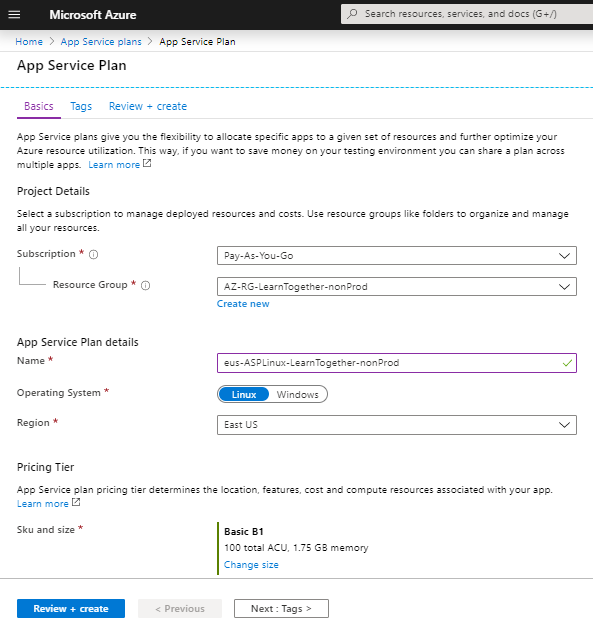
Create App Service Plan
We will select Linux OS for this App service plan and Basic B1 as SKU and size. Since we’ve already created the Resource group here so we will select it from the list.
Make sure the Region is same for both App Service plan and Resource Group.
Fill in the details and click on Review + create.
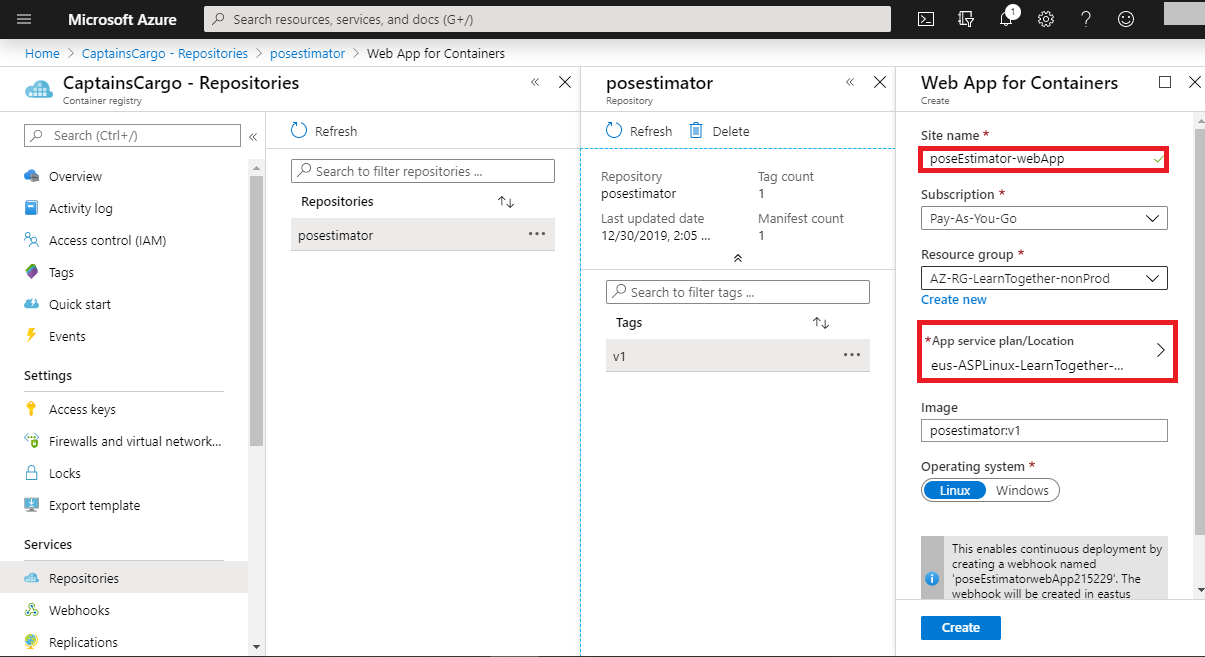
Deploy Image to Web App
Enter the value of Site name and app service plan. Select Create to deploy the image to web app.
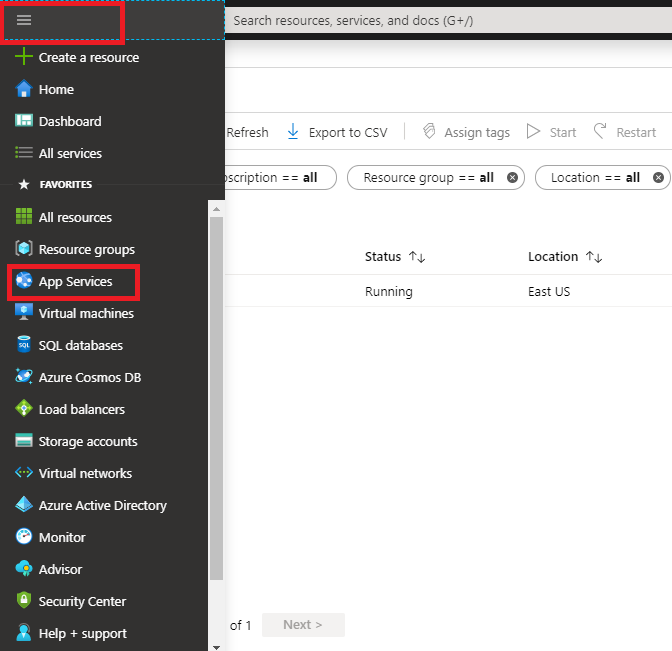
List Web App in App Services
If you have Flyout Menu view selected in Azure Portal then click on 3 horizontal lines icon on top left corner and select App Services.
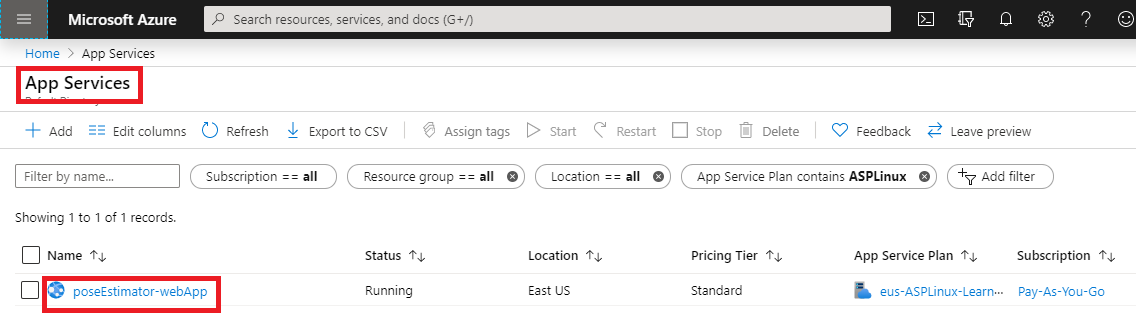
Your web app will be listing here which is poseEstimator-webApp in our case.
Add/Edit Application Settings
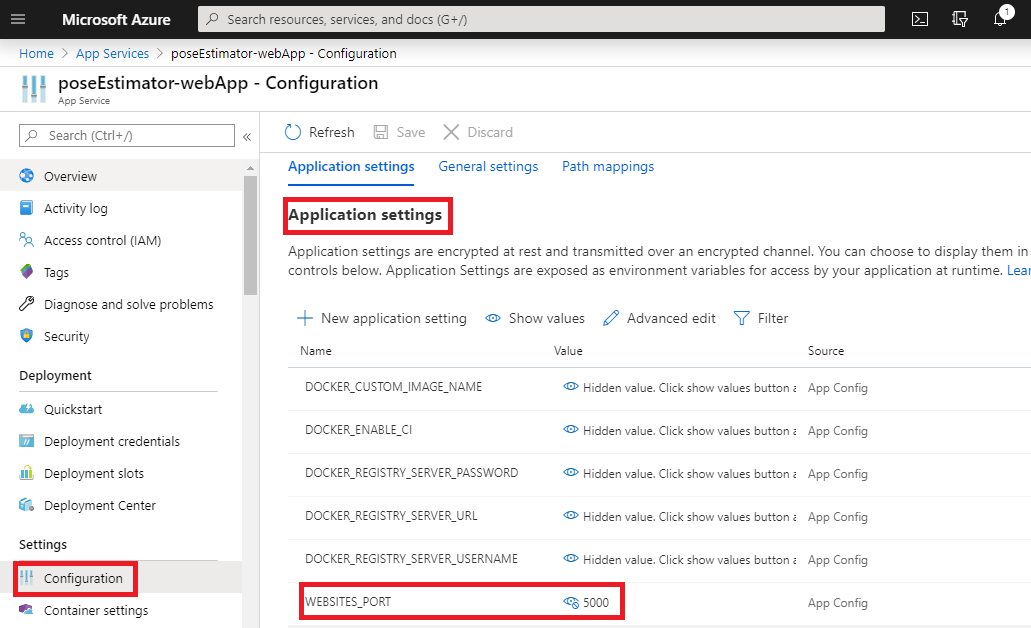
To list the Application settings in your web app, navigate to your web app in the portal and select Configurations.
This docker image exposes port 5000 so you need to add that port onto “Application Settings” named WEBSITES_PORT.
Web app Container settings
Navigate to your web app in the portal and select Container settings. Here you will find your container settings as shown below in image. i.e image name, its version and log field etc.
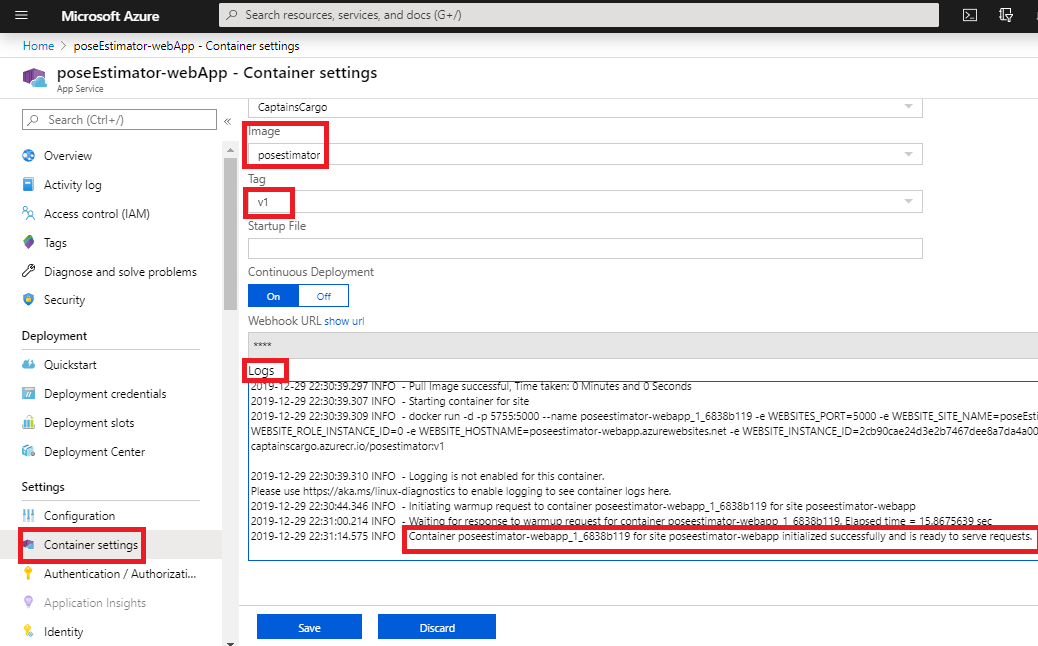
We need to wait till “Red outlined” message appears in the ‘Logs’ field as it pulls the image from registry and when pull is completed then starts the application.
Browse the application
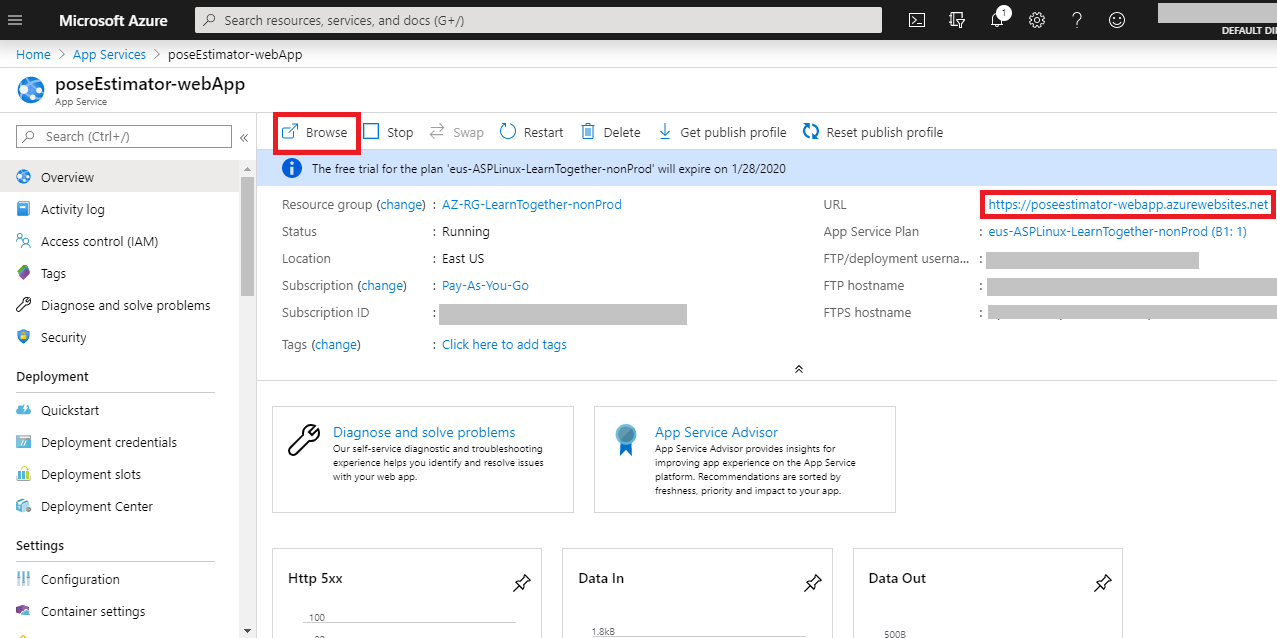
Navigate to your web app in the portal and select Overview. Here you will find ‘Browse’ and ‘URL’ to load your deployed image on web app.
Use the Model
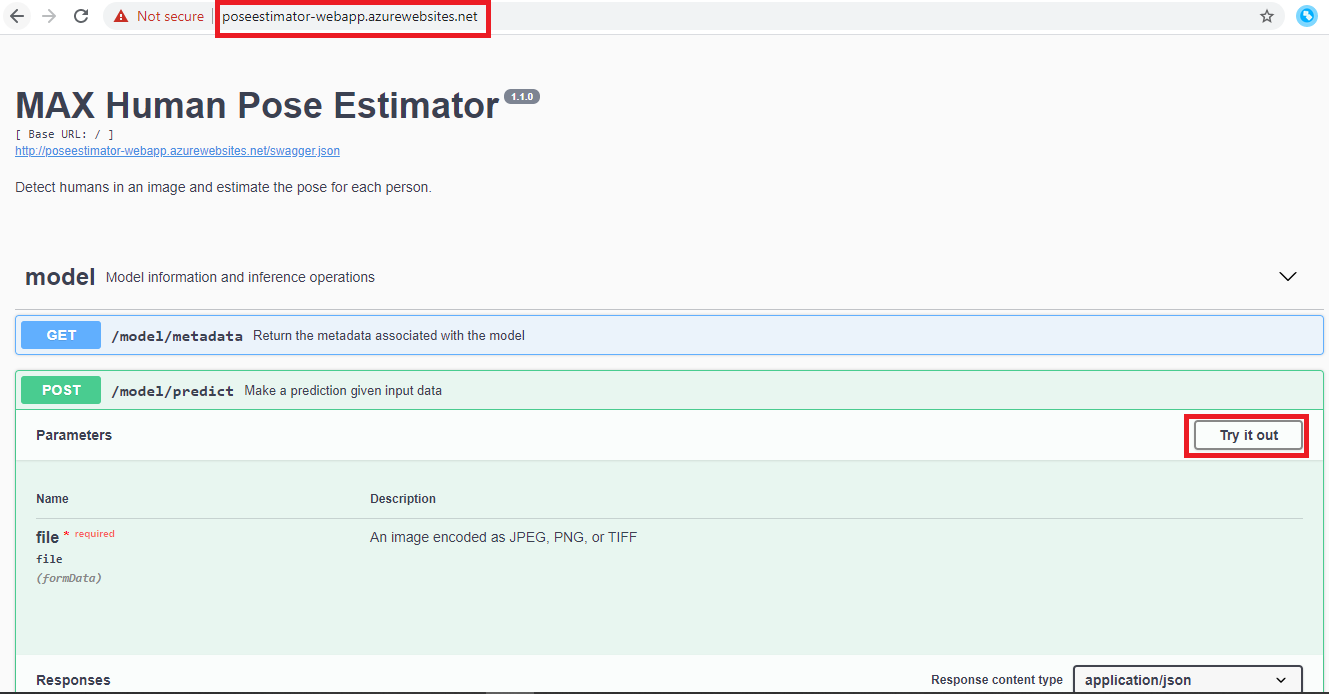
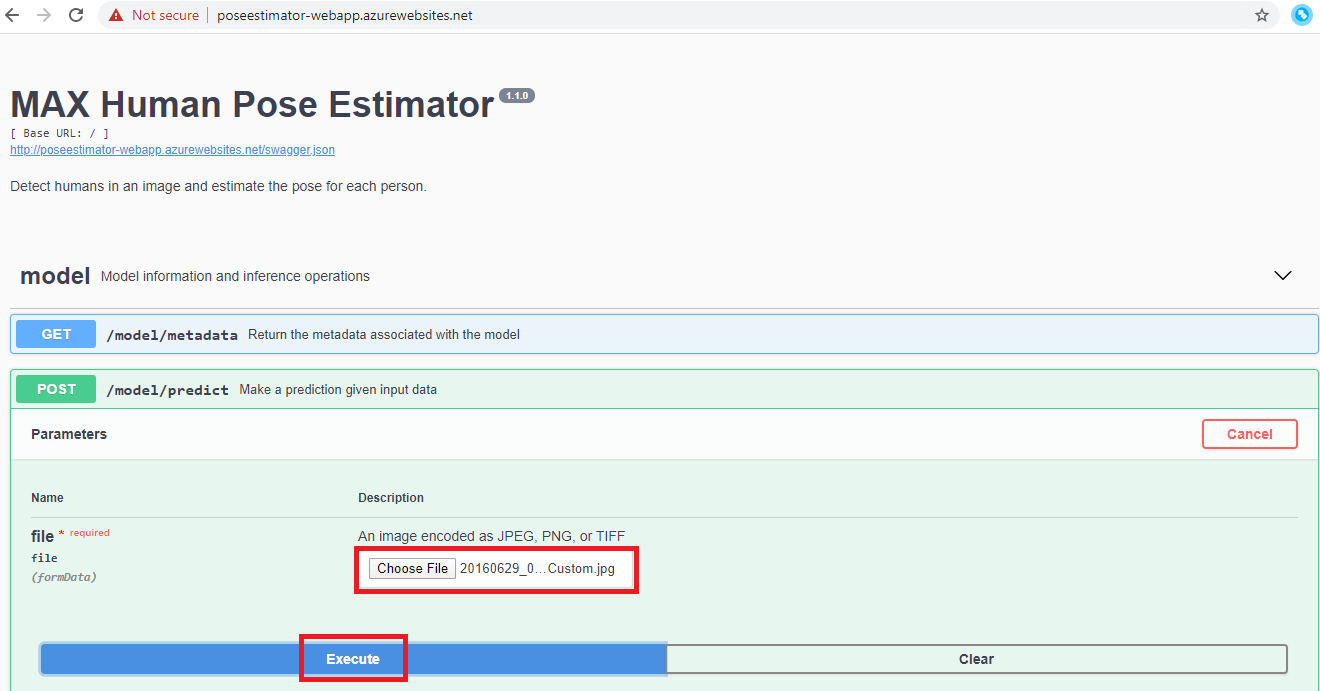
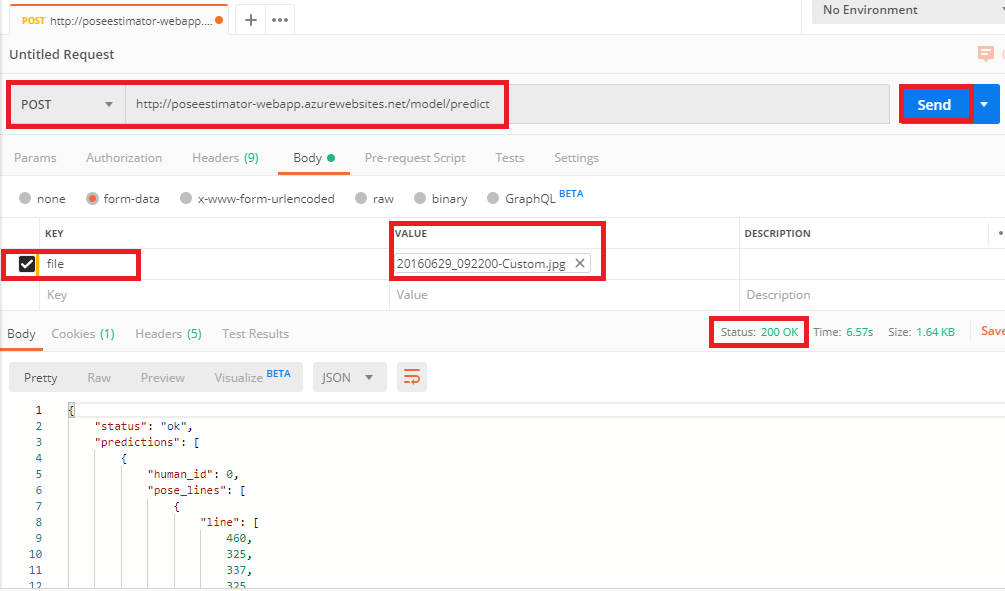
The API server automatically generates an interactive Swagger documentation page. Go to http://<webAppName>.azurewebsites.net (in our case, it is https://poseestimator-webapp.azurewebsites.net) or Browse to load it. From there you can explore the API and also create test requests. Use the model/predict endpoint to load a test image (you can use one of the test images from the samples folder) and get predicted labels for the image from the API.
Response/Result
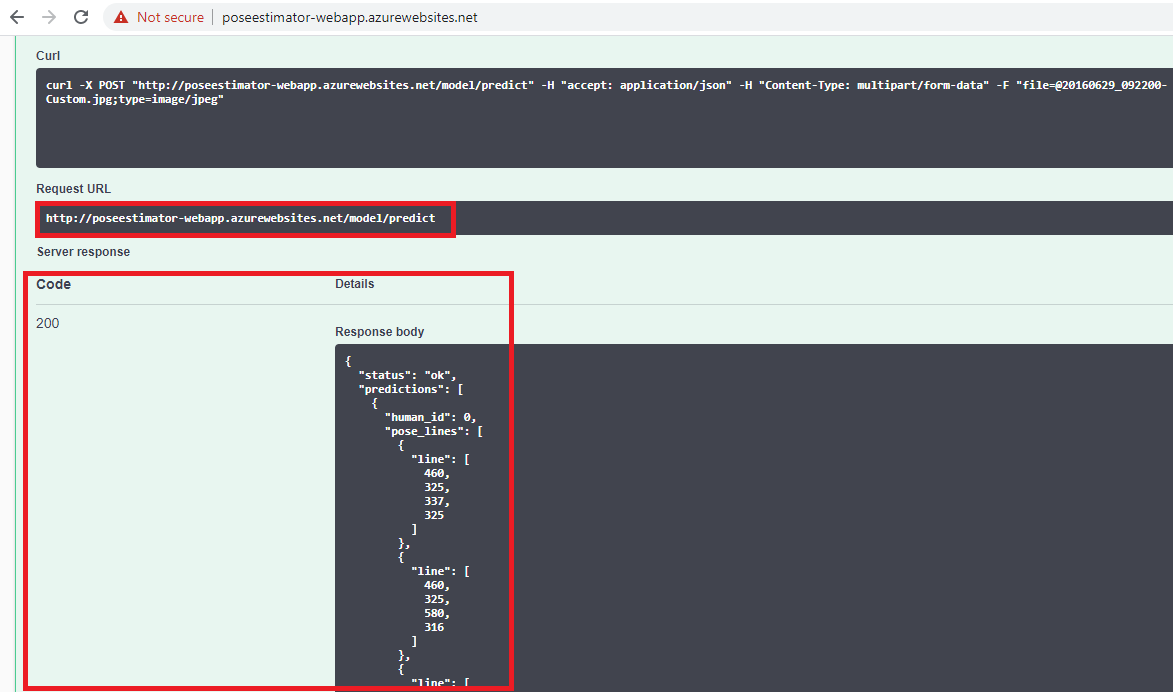
The result should be a JSON response but may vary depend upon an image which was uploaded in above steps. The result we got is given below:
{

  "status": "ok",

  "predictions": [

    {

      "human_id": 0,

      "pose_lines": [

        {

          "line": [

            444,

            269,

            392,

            269

          ]

        },

        ...

        {

          "line": [

            439,

            195,

            464,

            197

          ]

        }

      ],

      "body_parts": [

        {

          "part_id": 0,

          "part_name": "Nose",

          "score": "0.83899",

          "x": 428,

          "y": 205

        },

        ...

        {

          "part_id": 17,

          "part_name": "LEar",

          "score": "0.81776",

          "x": 464,

          "y": 197

        }

      ]

    },

    ...

  ]

}
List Different versions of an image
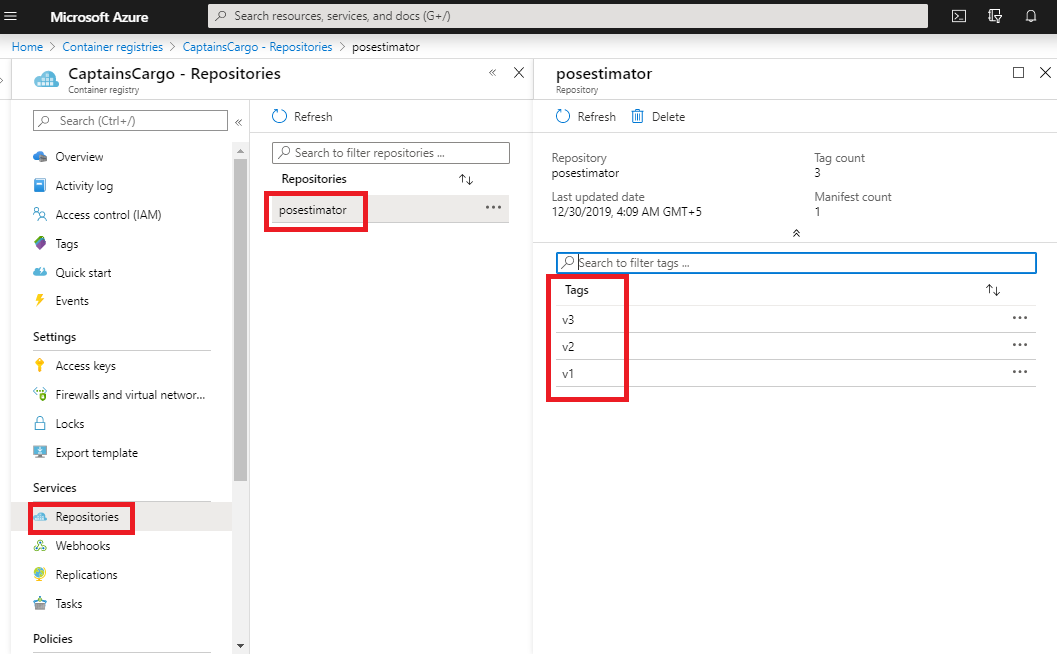
To list the images in your registry, navigate to your registry in the portal and select Repositories, then select the repository you created with docker push.
In this example, we select the posestimator repository, and we can see the v1, v2, v3-tagged image under TAGS.
Use specific version to the same web app
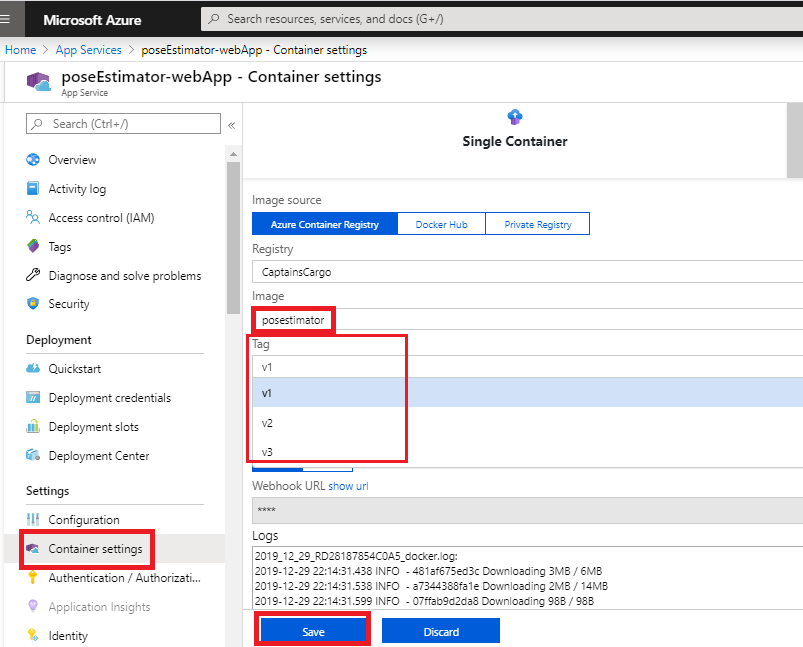
Navigate to your web app in the portal and select Container settings. Here you will find container settings as shown in this image. You can select the Image and Version to run the image with it. Make sure to click on Save to affect the settings.
POST request to API with postman
Conclusion: Putting everything together
In this tutorial, we deployed the containerized web app to Azure App service and saw how we can use different versions of an image in ACR and perform API operations of web app using postman.
Thank you for reading!