

This is Part 2 of Deploy a Python web app to Azure App Service on Linux. In Part 1, we went through the Azure Portal to create a Resource Group and an Azure Container Registry. In this part, we will build and push docker image to Azure Container Registry. Building a python based docker image, running it locally and push to Azure Container Registry using Docker and Azure CLI will be an essential part of this tutorial.
Let’s start fun part!
Run Locally
First, we will run the image locally and then deploy on web app using Azure container registry.
Build the Model
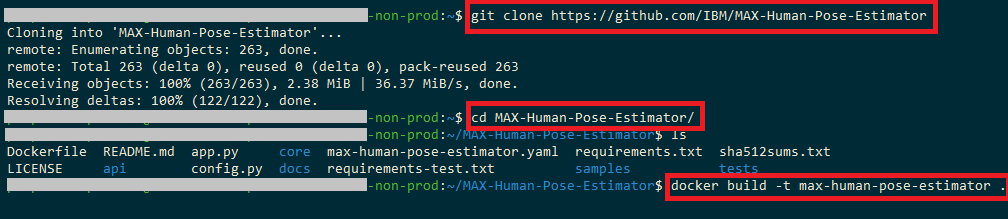
Clone this repository locally. In a terminal, run the following command:
$ git clone https://github.com/IBM/MAX-Human-Pose-Estimator
Note: If you are not familiar with the Model Asset Exchange, this introductory article provides a good overview.
Change directory into the repository base folder:
$ cd MAX-Human-Pose-Estimator
To build the docker image locally, run:
$ docker build -t max-human-pose-estimator .
All required model assets will be downloaded during the build process. Note that currently this docker image is CPU only (we can add support for GPU images).

Deploy the Model
To run the docker image, which automatically starts the model serving API, run:
$ docker run -it -p 5000:5000 max-human-pose-estimator

Use the Model (locally)
The API server automatically generates an interactive Swagger documentation page. Go to http://localhost:5000 to load it. From there you can explore the API and also create test requests. Use the model/predict endpoint to load a test image (you can use one of the test images from the samples folder) and get predicted labels for the image from the API.
Tag the image with different name and version for now and push to registry.
$ docker tag max-human-pose-estimator captainscargo.azurecr.io/posestimator:v1

Log in to Azure Container Registry
Before push and pull container images, you must log in to the ACR instance.
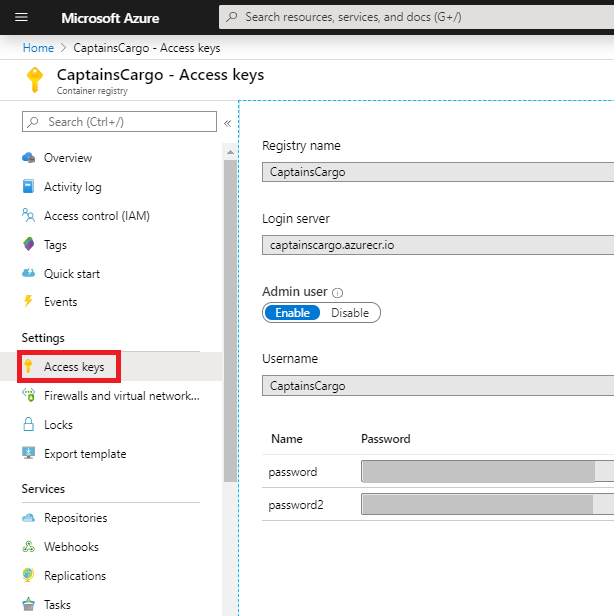
To obtain the registry details like registry name, login server and password etc from the “Container Registry” in the portal:
Select Access keys> Registry name
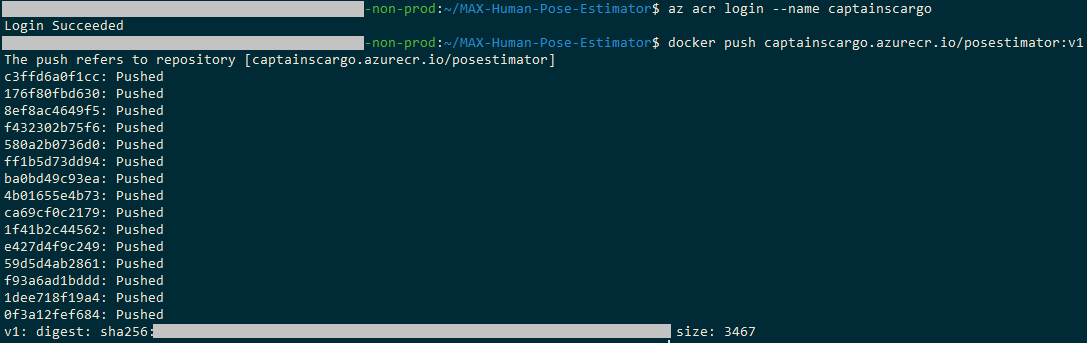
Open a shell in your OS, and use the az acr login command in the Azure CLI.
az acr login --name captainscargo
The command returns Login Succeeded once completed.
Push image to registry
docker push <acrLoginServer>/posestimator:v1
Now, use docker push to push the image to the ACR instance. Replace <acrLoginServer> with the login server name of your ACR instance. This example creates the posestimator repository, containing the posestimator:v1 image.
List container images
To list the images in your registry, navigate to your registry in the portal and select Repositories, then select the repository you created with docker push.
In this example, we select the posestimator repository, and we can see the v1-tagged image under TAGS.
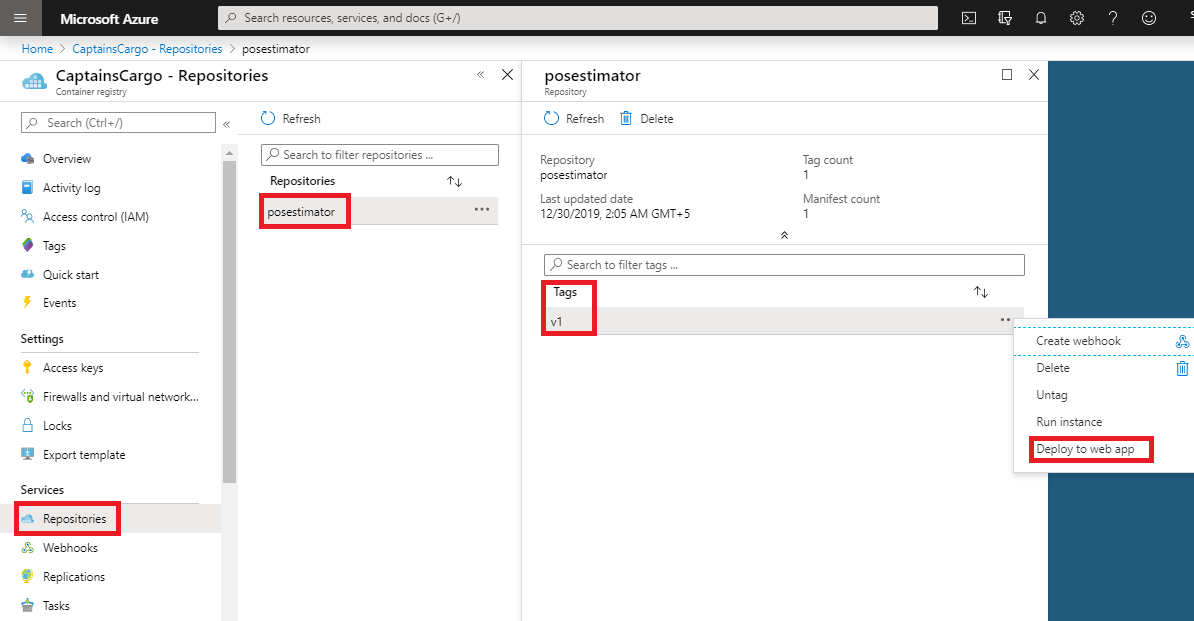
We can deploy this image to web app from here.
Conclusion: Putting everything together
In this part, we built a docker image, ran locally and pushed to Azure Container Registry using Azure CLI and Docker.
Next….
Thank you for reading!